How to Bind a Quilt with Pizzazz!
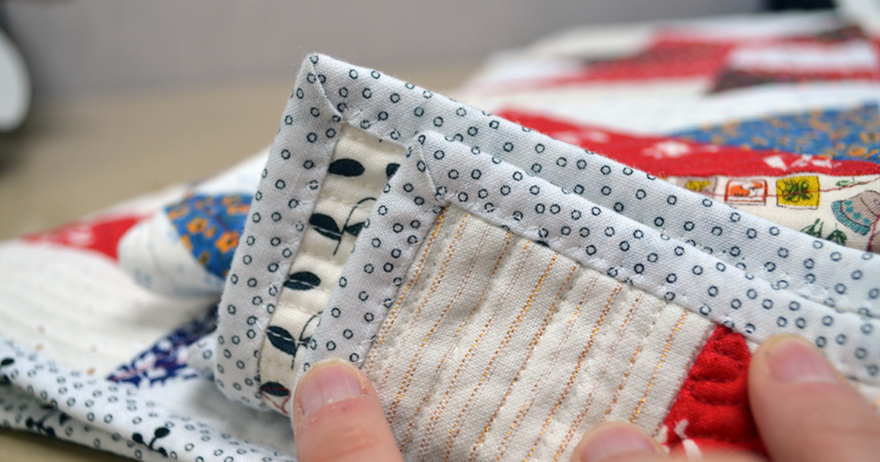
Chances are, if you are an experienced quilter, you have a few special techniques under your belt. You know how to piece accurately, cut precisely, and even “fudge” when your piecing and cutting are a bit off. But most quilters know just one technique for how to bind a quilt and that’s a shame. Because finishing a quilt is so much more than just adding a strip of fabric around the edge and calling it a day: binding adds beauty, design, and functionality to all quilts. You just need to choose the right technique for each quilt!

There are many different ways to bind a quilt, and the French-fold method is probably the gold standard. But have you considered all of your options? How about using piping on the edge of your quilt? Maybe varying the width of the binding from thin to thick? Or have you tried finishing your quilt with a facing or pillowcase technique? All of these are great options, but one of my recent favorites is creating a binding that changes colors to match the quilt top.

From our Shop


About the Expert
Malka Dubrawsky is a master at looking at a design dilemma and finding an innovative solution. Her method of creating a pieced binding is precise and elegant, allowing the eye to move across the quilt without interruption of color at the binding. This treatment is especially effective in modern quilts like Malka’s Ombre Radiance and Crossroads quilts.

Malka’s Pieced Binding Technique
This pieced binding is a little extra effort but it provides a flow across the quilt top that is very desirable. The pieced binding on the Crossroads Quilt is created from 1 1/2″ strips set aside in the cutting step. The goal is to match the binding strip to the predominant color of the edge, changing it all along the quilt to match the next color.
1
Place each binding strip on the quilt, 1 at a time, matching the strip color to the colorway of the quilt edge. Leave an unsewn tail of 2″–4″ on each side of the strip. Note: Start at a corner and work 1 seam at a time down 1 length of the quilt. You will miter the corners at a later step.
2
Work with 2 strips at a time where the colors change at the edge of the quilt top.
3
Fold each strip back on itself and create a crease along the short edges of the strips where they meet.
4
Align the creases, right sides together, and sew along the crease line. Trim, leaving a 1/4″ seam allowance. Press open.
5
Repeat steps 2–4 to create a pieced binding, changing color at each seam junction or across a stretch of color.
6
Sew the binding to the quilt, mitering the corners.
7
Hand sew the binding to the quilt back, turning under 1/4″ seam allowance as you work. Voila! You’ve now added a color-change binding technique to your quilting skill set!
Show Off Your Creations
Now that you know how to bind a quilt using Malka Dubrawsky’s creative method, we can’t wait to see what you create! No matter how you choose to bind your quilt, we know it’ll be a masterpiece. Be sure to share your creations with us on Facebook, Instagram, or the comments below!
Enjoying this article? Sign up for our newsletter!


Join the Conversation!