How to Free Motion Quilt on Vintage Linens
Vintage linens can add a touch of nostalgia and charm to any home, but they can also be transformed into stunning works of art with free motion quilting. If you have a collection of vintage linens that you would like to repurpose, learning how to free motion quilt on them can be a rewarding and enjoyable project. Learning how to free motion quilt on vintage linens is also a great way to breathe new life into old fabrics and create unique, one-of-a-kind pieces that will be treasured for years to come.
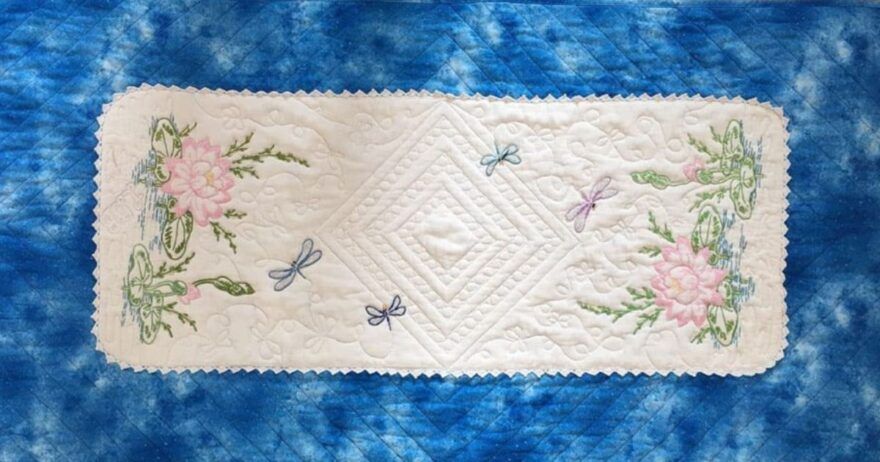
I always say every quilt has a story and this quilt has a great story. When my mom died, I got lots of vintage linens. I didn’t sort through them at that point; I just put them in a box and brought them home. When I finally took time to look at them, I found this old dresser scarf. I remember doing the embroidery. I also remember what house we lived in when I did that embroidery.

We moved from that house at the start of my 7th grade. We purchased the stamped dresser scarf fabric at the local dime store. I believe my Grandma Brown crocheted the edging.
Getting Started
To begin, I used two layers of Warm & Natural batting by The Warm Company. Using a spray adhesive, I placed the first layer of batting under the dresser scarf, then trimmed around it very carefully (with small scissors for better control) so the batting was under the fabric but not under the crocheted edge.

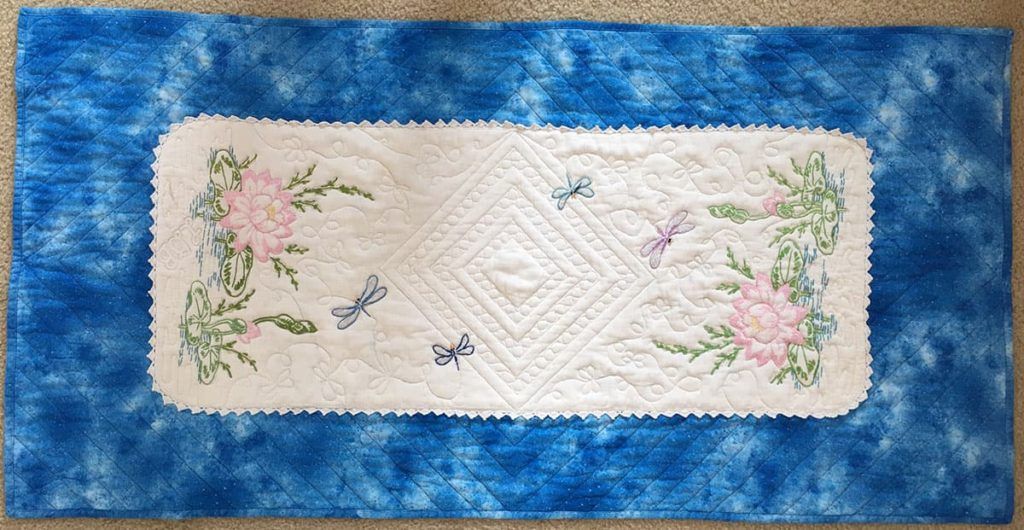
Next, I layered the blue fabric I was using as background, another layer of Warm & Natural, and the backing fabric. I want to point out here that I measured to center the dresser scarf on the background fabric. I marked the center of the dresser scarf both vertically and horizontally.

Next Steps
I marked the frame for my center design with a wash-away marker. But, now I had a problem. I wanted to put pearls in that frame, but I wasn’t confident that I could get them spaced correctly without marking them. I didn’t have a tool to mark those little circles and we are staying home, practicing social distancing, so no shopping for non-essentials.

I told Bake (my husband) what I needed, and he went to the garage and made me this little tool. He drilled the ½” hole in a piece of Plexiglass, cautioned me that the edges were sharper than a purchased tool would have, and I was ready to mark the pearls.

I’m assuming that you know how to free-motion quilt. If you don’t, we’ve got plenty of articles that teach about free-motion quilting. I’m telling you specifics for this particular project but not how to free-motion quilt in general. My circles are less than perfect but I am still pleased with how they came out.
Now for the Dragonflies
The next part was lots more fun. I just did loops and dragonflies to go with the embroidered dragonflies and wavy lines for water around the water lilies. And at the suggestion of my friend and quilt-maker, Charisma Horton, I added my initials.

I finished quilting the project by marking and quilting straight lines on the background. This part was feed-dog driven quilting. I’ve bound my old/new project and added a hanging sleeve made with corner triangles in order to make it easy to hang. There is a video on the Quilting Daily website that tells you how to make the corner triangle type of hanging sleeve.
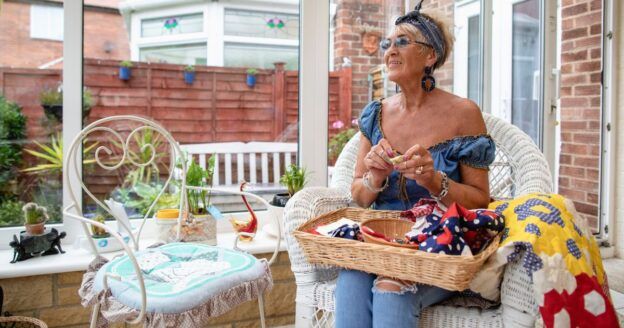
I’m delighted with this project and I think I can see more quilting of vintage linens in my future! I hope this quick lesson about how to free motion quilt on vintage linens helps you on your quilting journey. Practice and perseverance make all the difference!
Happy quilting!
Lori
Enjoying this article? Sign up for our newsletter!


How wonderful that you have so many vivid memories with this quilt! What a blessing for you and it’s beautifully enhanced on top of that! God bless you, Happy Resurrection Sunday